The Ultimate Setup Guide for Your Leica M11 D
Introduction
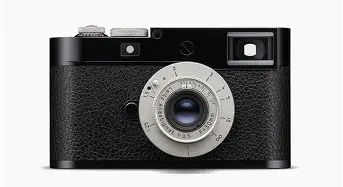
The Leica M11 D is positioned as a modern incarnation of the classic M rangefinder experience: precision-built, intentionally simple in controls, and optimized for photographers who value manual operation and exceptional image quality. This guide helps new owners and prospective buyers get the camera out of the box and configured for real-world shooting — street, documentary, portrait, travel, and fine-art photography. It focuses on practical setup steps, workflow recommendations, and decisions buyers typically care about when choosing and using a high-end rangefinder camera.
Why the Leica M11 D matters to photographers
Rangefinder cameras occupy a unique niche. They reward a slower, more deliberate approach to making images and excel at candid photography, low-profile reporting, and working with high-quality manual lenses. The M11 D builds on that heritage while integrating current digital conveniences. Buyers usually care about three things: image quality, handling and ergonomics, and lens compatibility. This guide addresses each of those areas and explains how to optimize settings, accessories, and workflow to get the most from the camera.
Initial setup — first 30 minutes
When unboxing the Leica M11 D, the first priority is to ensure the camera and accessories are safe and ready for use. A quick, methodical first-boot procedure both protects the gear and prepares a usable baseline configuration.
- Charge the battery fully before intensive use. New batteries often benefit from a full initial charge for accurate battery level reporting.
- Install a high-quality memory card. Choose a reputable UHS-II or comparable high-speed SD card for uninterrupted RAW capture and faster file transfers — size depends on shooting habits (64–256 GB are common choices for high-resolution RAW workflows).
- Power on and set language, date/time/timezone, and regional settings. These small details matter for file timestamping and metadata consistency across devices.
- Check for firmware updates via the official Leica app or Leica’s support site and apply updates before a shoot — firmware can add features, improve stability, or refine lens compatibility.
- Format the card in-camera. This ensures the card is clean and formatted to the camera’s filesystem for best reliability.
Core camera configuration
The Leica M11 D emphasizes manual control, but there are several digital options that impact image quality and day-to-day usability. These choices should reflect the photographer’s shooting style.
File formats and image quality
Set the camera to record RAW (DNG) and JPEG simultaneously if the workflow benefits from immediate sharing and long-term archival flexibility. RAW preserves the sensor’s full tonal range for post-processing, while in-camera JPEGs are useful for quick previews and mobile posting.
ISO, base sensitivity, and noise management
Establish a base ISO strategy. The Leica M series typically has strong base performance, so keeping ISO as low as practical will maximize dynamic range. For low-light documentary work, photographers often accept higher ISO with the understanding that careful RAW processing preserves skin tones and shadow detail.
Metering and exposure strategy
Choose a metering approach consistent with the subject. Spot or center-weighted metering is helpful for portraits and tricky highlights, while evaluative/matrix metering works well for balanced scenes. When in doubt, rely on exposure compensation and the camera’s histogram to fine-tune settings. Metering should be paired with a shooting philosophy: manual exposure for full control, aperture-priority for speed, and manual with a handheld meter for critical work.
Discover deals on Electronics — updated daily.
See Deals →White balance and color
Set an accurate white balance for mixed lighting or leave the camera in auto white balance if RAW processing is the norm. If shooting black-and-white, use the camera’s monochrome mode for in-camera previews, but retain RAW for color-to-BW conversions in post if more tonal control is desired.
Live View and focusing aids
While the primary rangefinder patch remains the heart of composition, Live View can be invaluable for critical focus with adapted or longer lenses, macro work, and level composition. Enable grid overlays, magnified focus, and any available focus peaking options to help nail focus when the rangefinder is insufficient.
Rangefinder-specific setup and calibration
Rangefinders require particular attention to alignment and lens behavior because manual focusing depends on precise coupling between the lens and viewfinder.
- Verify rangefinder alignment: Test across several focal lengths to confirm the focus patch and lens focus match. If parallax or misalignment is noticed at close distances, consider professional calibration.
- Understand parallax: Rangefinder framing differs at close distances — use Live View or become familiar with zone focusing markings for accurate near work.
- Zone focusing and distance scales: Practice pre-focusing at typical subject distances (e.g., 2–5m) for quick candid shooting where manual focus speed is essential.
Lenses and accessories — what buyers typically consider
Lens choice defines the Leica M experience. Buyers often prioritize a small set of high-quality primes that cover their main use cases.
- 50mm classic: A 50mm lens is versatile for portraits and street work and is often the starting point for an M shooter.
- 35mm for environmental storytelling: 35mm is ideal for travel and documentary work — it balances subject presence with context.
- 28mm or 21mm for wider scenes: Wider lenses require more framing practice with a rangefinder and may benefit from Live View at close distances.
- Summicron vs Summilux considerations: Faster lenses (wider apertures) are useful in low light and for shallow depth-of-field but are heavier and more costly. Slower lenses are lighter and often tack-sharp across the frame.
- Lens adaptability: The M mount accepts many third-party and adapted lenses. Verify flange focal distance and focus coupling when adapting non-M optics.
Essential accessories and workflow tools
Beyond lenses, some accessories significantly improve the daily experience and protect the investment.
- Quality leather or nylon case for protection that preserves quick access.
- A comfortable strap that distributes weight for long walks and prevents accidental drops.
- Spare battery and compact charger for extended shoots or travel.
- High-speed card reader and robust backup strategy — backup to at least two locations after every shoot.
- Cleaning kit and blower to maintain lens and sensor cleanliness.
- Optional external viewfinder for ultra-wide lenses or niche compositions where the internal viewfinder doesn't provide coverage.
Real-world use cases and recommended setups
Different photographic assignments benefit from tailored settings and lens choices. Below are practical starting configurations for common genres.
Street and documentary
Lens: 35mm or 50mm. Settings: aperture-priority at ƒ/5.6–ƒ/8 with ISO auto cap set to a level that preserves shutter speed (e.g., 1/125–1/500s). Strategy: zone focus and quick exposure compensation for changing light. Keep camera compact and on a short strap for rapid engagement.
Find top-rated Electronics products at great prices.
Shop Amazon →Portraits and environmental portraits
Lens: 50mm (fast) or 75mm when available. Settings: shoot wide open for subject separation or ƒ/4–ƒ/5.6 for environmental portraits. Use spot metering and expose for skin tones. Encourage natural light and use Live View to check critical focus on the eyes.
Travel and landscape
Lens: 28–35mm. Settings: manual or aperture-priority at ƒ/8–ƒ/11 for depth of field. Use low ISO and tripod for long exposures when needed. Use in-camera level (if available) and grid to maintain straight horizons.
Pros & Cons
- Pros
- Exceptional build quality and tactile, intuitive controls.
- High-resolution full-frame imaging suitable for large prints and critical cropping.
- Stealthy operation and compact lens ecosystem ideal for candid and travel photography.
- Strong manual-lens support and legendary M-mount optics with excellent rendering.
- Cons
- Premium price point that can be prohibitive for many buyers.
- Steep learning curve for photographers new to rangefinders and manual focusing.
- Limited automation compared with modern mirrorless bodies (no autofocus).
- Accessory and lens costs add up because of the specialized ecosystem.
Comparison: how the Leica M11 D stacks up
The table below compares the M11 D to adjacent models conceptually. This is a practical lens for understanding differences by use case rather than a spec-only battle.
| Aspect | Leica M11 D | Leica M11 (baseline) | Leica M10 (older generation) |
|---|---|---|---|
| Primary focus | High-resolution rangefinder with modern digital conveniences and a focus on manual craft | High-resolution M-series blend of tradition and modernity | Classic rangefinder experience with lower resolution and simpler electronics |
| Ideal use cases | Fine art, portrait, travel, street — users seeking image quality and discretion | Similar to M11 D; good for photographers wanting a modern M | Documentary and street photographers who prefer minimalism and analog-like controls |
| Handling | Robust, deliberate controls, Live View options for versatility | Robust with digital improvements | Most minimal and pure rangefinder handling |
| Price & ecosystem | Premium — attracts buyers committed to Leica glass and long-term ownership | Premium | Premium but often found used at lower price points |
Buying guide — what to consider before purchase
Buying a Leica is frequently as much about the ecosystem and ownership experience as it is about raw specs. The following checklist helps prospective owners decide whether the M11 D is the right camera for them.
- Are you comfortable with manual focus? Rangefinders reward practice. If quick AF is essential, consider a different system.
- How important is size and discretion? The M’s small footprint and quiet operation excel for street and travel photography where blending in matters.
- Lens plan: Factor the cost and choices of lenses. Starting with one or two primes is common; decide which focal lengths match typical assignments.
- Post-processing workflow: Expect to work in RAW for maximum control. Ensure software compatibility (Lightroom, Capture One, etc.) and develop a backup routine.
- Service and resale: Leica cameras hold value well — consider buying from an authorized dealer if warranty and service are priorities, or a reputable used market seller if budget-conscious.
- Try before buying: Renting or borrowing an M-series camera for a weekend shoot is one of the best ways to determine fit.
Maintenance and long-term care
Leica cameras are built to last but require routine care. Keep the body and lenses clean, service the rangefinder alignment if any front/back focus inconsistency appears, and maintain batteries and memory cards per manufacturer guidance. For frequent travelers, a simple insurance plan that covers accidental damage can be a sensible addition.
Conclusion
The Leica M11 D is aimed at photographers who value the unique craft of rangefinder photography combined with modern digital image quality. Setting it up well means balancing a few digital conveniences (RAW workflow, Live View, firmware updates) with traditional rangefinder practices (zone focusing, lens selection, calibration). For buyers, the most important considerations are lens plans, shooting style, and comfort with manual techniques. For owners, a careful initial setup, a small set of versatile lenses, and a reliable backup workflow unlock the camera’s strengths. When configured thoughtfully, the M11 D becomes an expressive tool for an intentional photographic practice — one that rewards patience, skill, and attention to light.